Description
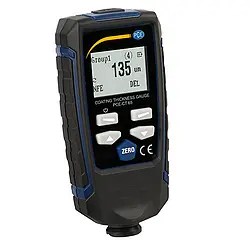
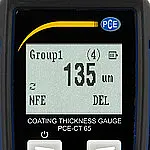
PCE-CT 65 Paint Thickness Gauge
Non-destructive coating and dry film thickness (DFT) measuring device for use on ferrous and non-ferrous metal substrates
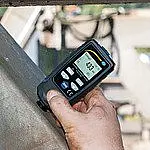
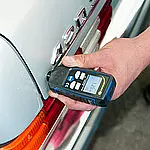
PCE-CT 65 is a paint thickness gauge that uses magnetic induction (ferrous) or eddy current (non-ferrous) to take non-destructive measurements of coating and dry film thickness (DFT) on metal substrates such as steel and aluminum. This thickness gauge is ideal for painted and powder-coated surface testing, automotive paint inspection, coated material testing, and manufacturing quality control applications.
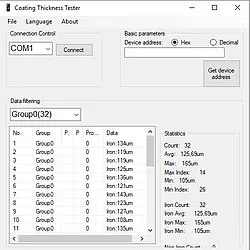
The easy-to-use downloadable PC-compatible software included with this thickness gauge allows for detailed analysis of measurement results via computer. Measurement values are shown in a table and different working modes can be selected for data filtering. Statistics include the maximum, minimum and average value per working group. Statistics can be divided by ferrous and non-ferrous material. The software also counts how many readings have been stored in each material group. For more details, please refer to the user manual.
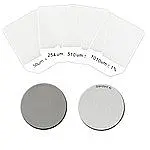
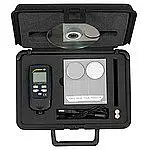
– Includes calibration shims and blocks for DIY accuracy testing, a carrying case for easy transport, and a 2-year warranty against manufacturer defects
– Optional ISO calibration certificate available for purchase separately – see accessories tab for details
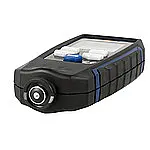
– Features two measuring modes (ferrous and non-ferrous) with integrated sensors for comfortable, one-handed operation
– Saves up to 1500 measurements to memory
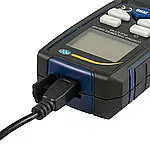
– Comes with a USB cable and downloadable PC software (see downloads tab) for detailed analysis of measurement results via computer
Specification
| Ferrous metals | |
| Principle | Magnetic induction |
| Measuring range | 0 … 1350 µm / 0 … 53.1 mils |
| Accuracy | 0 … 1000 µm: (±2.5 % ±2 µm) 1000 µm … 1350 µm: ±3.5 % 0 … 39.3 mils: (±2 % ±0.08 mils) 39.3 mils … 53.1 mils: ±3.5 % |
| Resolution | 0 … 100 µm: 0.1 µm 100 µm … 1000 µm: 1 µm in 1000 mm … 1350 µm: 0.01 mm 0 … 10 mils: 0.01 mils 10 mils … 53.1 mils: 0 … 1 mils |
| Smallest surface | Ø 7 mm / Ø 0.3 in |
| Min. curvature radius | 1.5 mm / 0.05 in |
| Min. substrate thickness | 0.5 mm / 0.02 in |
| Non-ferrous metals | |
| Principle | Eddy current |
| Measuring range | 0 … 1350 µm / 0 … 53.1 mils |
| Accuracy | 0 … 1000 µm: ±(2.5 % ±2 µm) 1000 µm … 1350 µm: ±3.5 % 0 … 39.3 mils: ±(2 % ±0.08 mils) 39.3 mils … 53.1 mils: ±3.5 % |
| Resolution | 0 … 100 µm: 0.1 .mu.m 100 µm … 1000 µm: 1 µm in 1000 mm … 1350 µm: 0.01 mm 0 … 10 mils: 0.01 mils 10 mils … 53.1 mils: 0 … 1 mils |
| Smallest surface | Ø 5 mm / Ø 0.2 in |
| Min. curvature radius | 3 mm / 0.1 in |
| Min. substrate thickness | 0.3 mm / 0.01 in |
| Units | µm, mils |
| Functions | Alarm function, display lighting, automatic shutdown, calibration, memory function |
| Memory option | 30 storage groups with a capacity of 50 measurements each = 1500 measurements total |
| Interface | USB |
| Environmental conditions | 0 … 40°C / 32° F … 104°F, 20% … 90% rh |
| Power supply | 2 x 1.5V AAA batteries |
Delivery Scope
1 x PCE-CT 65 Paint thickness gauge
2 x 1.5V AAA batteries
5 x Calibration shims
2 x Calibration blocks (aluminum and iron)
1 x USB cable
1 x User manual
1 x Carrying case
Note: The PC software is available for download via the downloads tab of our website.

